Hoje vamos falar sobre a Franzininho Wi-Fi (ESP32-S2) com a IDE do Arduino. Vamos gravar o bootloader correto na placa para que possamos programa-la com o software oficial do Arduino.
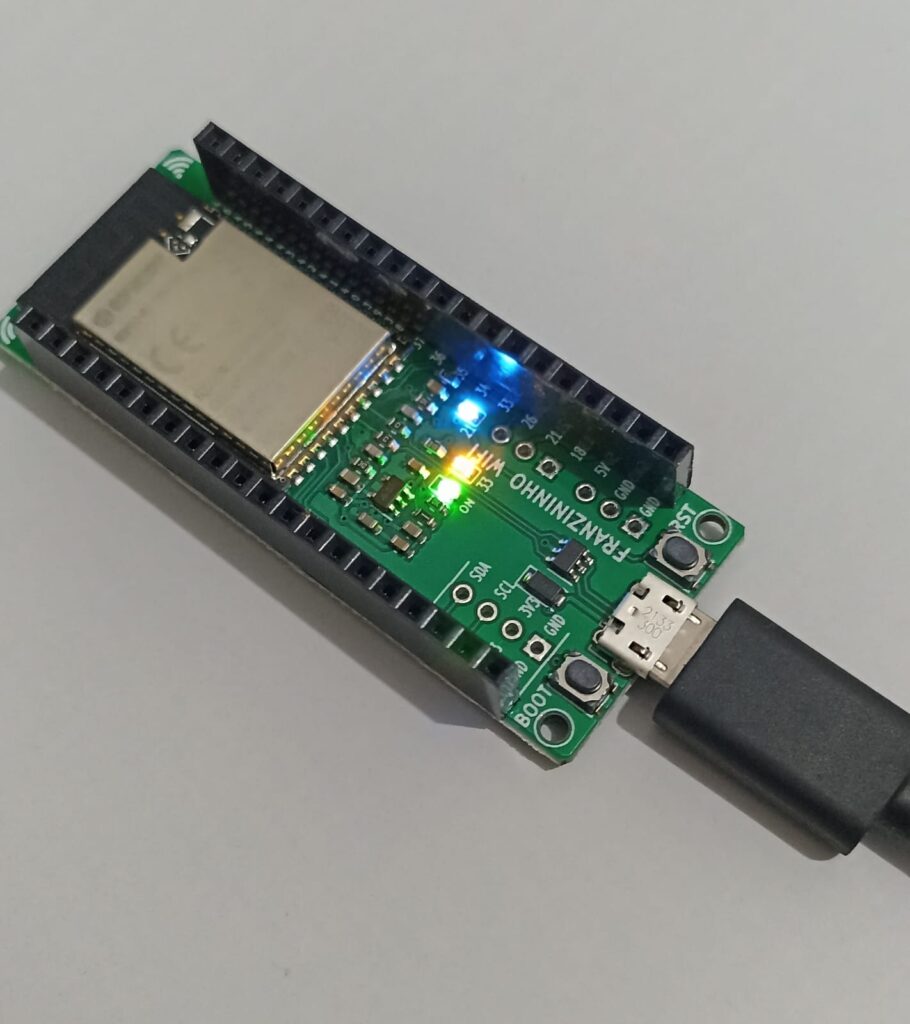
Já conhecemos a Franzininho Wi-Fi neste artigo anterior, onde vimos que ela pode ser programada de diversas formas. Quer ler sobre ela em Inglês? clique aqui.
Se você também é um maker ou até mesmo um curioso, além de estudante ou profissional, as chances de conhecer a IDE do Arduino são muito grandes.
Ela tem muitos códigos prontos e também é fácil achar muita coisa na internet (aqui mesmo no blog tem muita coisa).
Para iniciar, vamos gravar o bootloader para Arduino dentro da Franzininho Wi-Fi. Abra esta página e siga o procedimento. Agora abra a IDE do Arduino e cole o código abaixo. Ele é inspirado no “blinkWithoutDelay” que vem junto á IDE.
/*
  Blink without Delay

  Turns on and off a light emitting diode (LED) connected to a digital pin,
  without using the delay() function. This means that other code can run at the
  same time without being interrupted by the LED code.

  The circuit:
  - Use the onboard LED.
  - Note: Most Arduinos have an on-board LED you can control. On the UNO, MEGA
    and ZERO it is attached to digital pin 13, on MKR1000 on pin 6. LED_BUILTIN
    is set to the correct LED pin independent of which board is used.
    If you want to know what pin the on-board LED is connected to on your
    Arduino model, check the Technical Specs of your board at:
    https://www.arduino.cc/en/Main/Products

  created 2005
  by David A. Mellis
  modified 8 Feb 2010
  by Paul Stoffregen
  modified 11 Nov 2013
  by Scott Fitzgerald
  modified 9 Jan 2017
  by Arturo Guadalupi

  This example code is in the public domain.

  https://www.arduino.cc/en/Tutorial/BuiltInExamples/BlinkWithoutDelay
*/

// constants won't change. Used here to set a pin number:
const int ledPin1 = 21;  // the number of the LED pin
const int ledPin2 = 33;  // the number of the LED pin

// Variables will change:
int ledState = LOW;  // ledState used to set the LED

// Generally, you should use "unsigned long" for variables that hold time
// The value will quickly become too large for an int to store
unsigned long previousMillis = 0;  // will store last time LED was updated

// constants won't change:
const long interval = 200;  // interval at which to blink (milliseconds)

void setup() {
  // set the digital pin as output:
  pinMode(ledPin1, OUTPUT);
  pinMode(ledPin2, OUTPUT);
}

void loop() {
  // here is where you'd put code that needs to be running all the time.

  // check to see if it's time to blink the LED; that is, if the difference
  // between the current time and last time you blinked the LED is bigger than
  // the interval at which you want to blink the LED.
  unsigned long currentMillis = millis();

  if (currentMillis - previousMillis >= interval) {
    // save the last time you blinked the LED
    previousMillis = currentMillis;

    // if the LED is off turn it on and vice-versa:
    if (ledState == LOW) {
      ledState = HIGH;
    } else {
      ledState = LOW;
    }

    // set the LED with the ledState of the variable:
    digitalWrite(ledPin1, ledState);
    digitalWrite(ledPin2, !ledState);
  }
}
Clique em “upload” e observe a Franzininho. O que este código faz é piscar os LEDs da placa alternadamente, primeiro o pino 21 depois o pino 33.
Exemplo com utilização da funcionalidade Wi-Fi.
Utilizaremos inicialmente o exemplo presente neste blog (em Inglês); você precisa apenas alterar o SSID e a senha para aqueles da sua rede local.
/*********
  Rui Santos
  Complete project details at https://randomnerdtutorials.com
*********/

// Load Wi-Fi library
#include <WiFi.h>

// Replace with your network credentials
const char* ssid = "seussid";
const char* password = "suasenha";

// Set web server port number to 80
WiFiServer server(80);

// Variable to store the HTTP request
String header;

// Auxiliar variables to store the current output state
String output33State = "off";
String output21State = "off";

// Assign output variables to GPIO pins
const int output33 = 26;
const int output21 = 27;

// Current time
unsigned long currentTime = millis();
// Previous time
unsigned long previousTime = 0;
// Define timeout time in milliseconds (example: 2000ms = 2s)
const long timeoutTime = 2000;

void setup() {
  Serial.begin(115200);
  // Initialize the output variables as outputs
  pinMode(output33, OUTPUT);
  pinMode(output21, OUTPUT);
  // Set outputs to LOW
  digitalWrite(output33, LOW);
  digitalWrite(output21, LOW);

  // Connect to Wi-Fi network with SSID and password
  Serial.print("Connecting to ");
  Serial.println(ssid);
  WiFi.begin(ssid, password);
  while (WiFi.status() != WL_CONNECTED) {
    delay(500);
    Serial.print(".");
  }
  // Print local IP address and start web server
  Serial.println("");
  Serial.println("WiFi connected.");
  Serial.println("IP address: ");
  Serial.println(WiFi.localIP());
  server.begin();
}

void loop(){
  WiFiClient client = server.available();   // Listen for incoming clients

  if (client) {                             // If a new client connects,
    currentTime = millis();
    previousTime = currentTime;
    Serial.println("New Client.");          // print a message out in the serial port
    String currentLine = "";                // make a String to hold incoming data from the client
    while (client.connected() && currentTime - previousTime <= timeoutTime) {  // loop while the client's connected
      currentTime = millis();
      if (client.available()) {             // if there's bytes to read from the client,
        char c = client.read();             // read a byte, then
        Serial.write(c);                    // print it out the serial monitor
        header += c;
        if (c == '\n') {                    // if the byte is a newline character
          // if the current line is blank, you got two newline characters in a row.
          // that's the end of the client HTTP request, so send a response:
          if (currentLine.length() == 0) {
            // HTTP headers always start with a response code (e.g. HTTP/1.1 200 OK)
            // and a content-type so the client knows what's coming, then a blank line:
            client.println("HTTP/1.1 200 OK");
            client.println("Content-type:text/html");
            client.println("Connection: close");
            client.println();

            // turns the GPIOs on and off
            if (header.indexOf("GET /33/on") >= 0) {
              Serial.println("GPIO 33 on");
              output33State = "on";
              digitalWrite(output26, HIGH);
            } else if (header.indexOf("GET /33/off") >= 0) {
              Serial.println("GPIO 33 off");
              output33State = "off";
              digitalWrite(output33, LOW);
            } else if (header.indexOf("GET /21/on") >= 0) {
              Serial.println("GPIO 21 on");
              output21State = "on";
              digitalWrite(output21, HIGH);
            } else if (header.indexOf("GET /21/off") >= 0) {
              Serial.println("GPIO 21 off");
              output21State = "off";
              digitalWrite(output21, LOW);
            }

            // Display the HTML web page
            client.println("<!DOCTYPE html><html>");
            client.println("<head><meta name=\"viewport\" content=\"width=device-width, initial-scale=1\">");
            client.println("<link rel=\"icon\" href=\"data:,\">");
            // CSS to style the on/off buttons
            // Feel free to change the background-color and font-size attributes to fit your preferences
            client.println("<style>html { font-family: Helvetica; display: inline-block; margin: 0px auto; text-align: center;}");
            client.println(".button { background-color: #4CAF50; border: none; color: white; padding: 16px 40px;");
            client.println("text-decoration: none; font-size: 30px; margin: 2px; cursor: pointer;}");
            client.println(".button2 {background-color: #555555;}</style></head>");

            // Web Page Heading
            client.println("<body><h1>ESP32 Web Server</h1>");

            // Display current state, and ON/OFF buttons for GPIO 33
            client.println("<p>GPIO 33 - State " + output33State + "</p>");
            // If the output33State is off, it displays the ON button
            if (output33State=="off") {
              client.println("<p><a href=\"/33/on\"><button class=\"button\">ON</button></a></p>");
            } else {
              client.println("<p><a href=\"/33/off\"><button class=\"button button2\">OFF</button></a></p>");
            }

            // Display current state, and ON/OFF buttons for GPIO 21
            client.println("<p>GPIO 21 - State " + output21State + "</p>");
            // If the output21State is off, it displays the ON button
            if (output21State=="off") {
              client.println("<p><a href=\"/21/on\"><button class=\"button\">ON</button></a></p>");
            } else {
              client.println("<p><a href=\"/21/off\"><button class=\"button button2\">OFF</button></a></p>");
            }
            client.println("</body></html>");

            // The HTTP response ends with another blank line
            client.println();
            // Break out of the while loop
            break;
          } else { // if you got a newline, then clear currentLine
            currentLine = "";
          }
        } else if (c != '\r') {  // if you got anything else but a carriage return character,
          currentLine += c;      // add it to the end of the currentLine
        }
      }
    }
    // Clear the header variable
    header = "";
    // Close the connection
    client.stop();
    Serial.println("Client disconnected.");
    Serial.println("");
  }
}
Altere os valores de “seussid” e “suasenha”. Ao colocar este sketch na Franzininho Wi-Fi eu começei a ter um problema, a porta COM sumia do computador.
Procurei um pouco na internet e achei esta thread de fórum, que sugeriu um sketch para escanear redes Wi-Fi. Joguei o código do scanner para a Franzininho Wi-Fi e funcinou, ele escaneia as redes que estão por perto. Então o problema só pode ser no código exposto acima.
Encontrei o código abaixo no site da Usinainfo, e desta vez funcionou. Lembre-se de alterar “seussid” e “suasenha”.
#include <WiFi.h>

const char* ssid = "seussid";
const char* password = "suasenha";
int LED = 33;
WiFiServer server(80);

void setup() {
  Serial.begin(115200);
  pinMode(LED, OUTPUT);

  Serial.println();
  Serial.print("Conectando-se a ");
  Serial.println(ssid);
  WiFi.begin(ssid, password);

  while (WiFi.status() != WL_CONNECTED) {
    delay(500);
    Serial.print(".");
  }

  Serial.println("");
  Serial.println("WiFi conectada.");
  Serial.println("Endereço de IP: ");
  Serial.println(WiFi.localIP());

  server.begin();
}

void loop() {
  WiFiClient client = server.available();
  if (client) {
    Serial.println("New Client.");
    String currentLine = "";
    while (client.connected()) {
      if (client.available()) {
        char c = client.read();
        Serial.write(c);
        if (c == '\n') {
          if (currentLine.length() == 0) {
            client.println("HTTP/1.1 200 OK");
            client.println("Content-type:text/html");
            client.println();
            client.print("Click <a href=\"/H\">here</a> to turn the LED on pin 33 on.<br>");
            client.print("Click <a href=\"/L\">here</a> to turn the LED on pin 33 off.<br>");
            client.println();
            break;
          } else {
            currentLine = "";
          }
        } else if (c != '\r') {
          currentLine += c;
        }
        if (currentLine.endsWith("GET /H")) {
          digitalWrite(LED, HIGH);
        }
        if (currentLine.endsWith("GET /L")) {
          digitalWrite(LED, LOW);
        }
      }
    }
    client.stop();
    Serial.println("Client Disconnected.");
  }
}
Ao carregar o sketch na Franzininho Wi-Fi e abrir o monitor serial da IDE do Arduino, um endereço de IP é mostado. Digite este endereço de IP em um navegador (poder ser no celular, desde que esteja no mesmo Wi-Fi da placa).
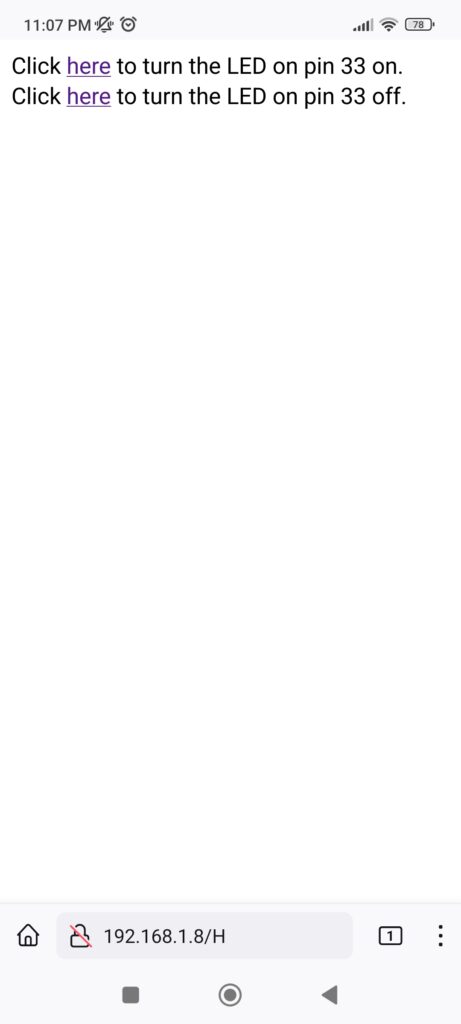
Na página que se abrir, clique nos botões para ligar e desligar o LED do pino 33 da Franzininho Wi-Fi. Observe a placa e divirta-se.
Conclusão: existe uma variedade de códigos prontos na internet para fazer qualquer coisa relacionado à Wi-Fi. Observa-se que placa Franzininho Wi-Fi é uma ótima ferramenta de aprendizado, sugiro você brincar bastante com seus periféricos.



Deixe um comentário