Vamos aprender a utilizar o Sensor DS18b20 com ESP32-S2 Franzininho. Este sensor fabricado pela Analog devices é capaz de se comunicar com um microcontrolador através de um único fio, via protocolo one-wire. O one-wire é um protocolo Serial similar ao i2c, porém com menor velocidade e maior alcance.
Estes sensor é um velho conhecido de nós makers/fazedores/estudantes/curiosos, vem no formato mostrado abaixo. São necessários três conexões: +V (geralmente 3,3V), GND e sinal.
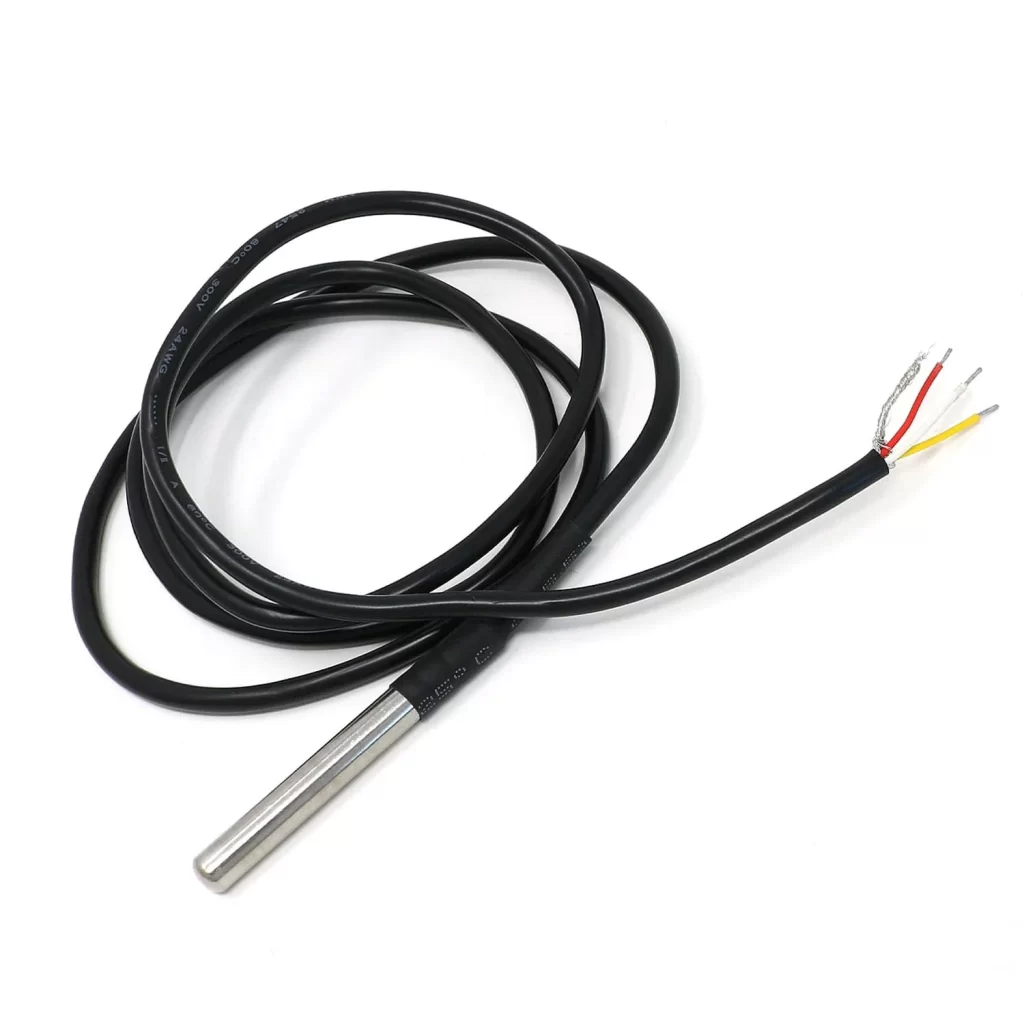
Para elaboração deste artigo eu me baseei em informações da Robocore e da CurtoCircuito. Não é necessário instalar nenhuma biblioteca especial, basta ter na sua IDE a biblioteca OneWire. Este código do Paul Stoffregen é tudo que precisamos (veja abaixo).
OneWire  ds(9);  // on pin 9 (a 4.7K resistor is necessary)

void setup(void) {
  Serial.begin(115200);
}

void loop(void) {
  byte i;
  byte present = 0;
  byte type_s;
  byte data[9];
  byte addr[8];
  float celsius, fahrenheit;

  if ( !ds.search(addr)) {
    Serial.println("No more addresses.");
    Serial.println();
    ds.reset_search();
    delay(250);
    return;
  }

  Serial.print("ROM =");
  for( i = 0; i < 8; i++) {
    Serial.write(' ');
    Serial.print(addr[i], HEX);
  }

  if (OneWire::crc8(addr, 7) != addr[7]) {
      Serial.println("CRC is not valid!");
      return;
  }
  Serial.println();

  // the first ROM byte indicates which chip
  switch (addr[0]) {
    case 0x10:
      Serial.println("  Chip = DS18S20");  // or old DS1820
      type_s = 1;
      break;
    case 0x28:
      Serial.println("  Chip = DS18B20");
      type_s = 0;
      break;
    case 0x22:
      Serial.println("  Chip = DS1822");
      type_s = 0;
      break;
    default:
      Serial.println("Device is not a DS18x20 family device.");
      return;
  }

  ds.reset();
  ds.select(addr);
  ds.write(0x44, 1);        // start conversion, with parasite power on at the end

  delay(1000);     // maybe 750ms is enough, maybe not
  // we might do a ds.depower() here, but the reset will take care of it.

  present = ds.reset();
  ds.select(addr);
  ds.write(0xBE);         // Read Scratchpad

  Serial.print("  Data = ");
  Serial.print(present, HEX);
  Serial.print(" ");
  for ( i = 0; i < 9; i++) {           // we need 9 bytes
    data[i] = ds.read();
    Serial.print(data[i], HEX);
    Serial.print(" ");
  }
  Serial.print(" CRC=");
  Serial.print(OneWire::crc8(data, 8), HEX);
  Serial.println();

  // Convert the data to actual temperature
  // because the result is a 16 bit signed integer, it should
  // be stored to an "int16_t" type, which is always 16 bits
  // even when compiled on a 32 bit processor.
  int16_t raw = (data[1] << 8) | data[0];
  if (type_s) {
    raw = raw << 3; // 9 bit resolution default
    if (data[7] == 0x10) {
      // "count remain" gives full 12 bit resolution
      raw = (raw & 0xFFF0) + 12 - data[6];
    }
  } else {
    byte cfg = (data[4] & 0x60);
    // at lower res, the low bits are undefined, so let's zero them
    if (cfg == 0x00) raw = raw & ~7;  // 9 bit resolution, 93.75 ms
    else if (cfg == 0x20) raw = raw & ~3; // 10 bit res, 187.5 ms
    else if (cfg == 0x40) raw = raw & ~1; // 11 bit res, 375 ms
    //// default is 12 bit resolution, 750 ms conversion time
  }
  celsius = (float)raw / 16.0;
  fahrenheit = celsius * 1.8 + 32.0;
  Serial.print("  Temperature = ");
  Serial.print(celsius);
  Serial.print(" Celsius, ");
  Serial.print(fahrenheit);
  Serial.println(" Fahrenheit");
}
Diagrama esquemático e testes
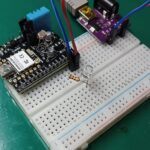
Faça a ligação elétrica conforme abaixo, note que um resistor de pull-up de 4k7 é necessário entre o sinal e o VCC. A alimentação do sensor é com 3,3V.
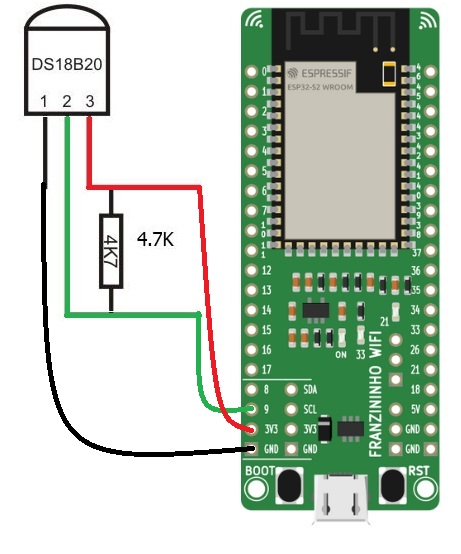
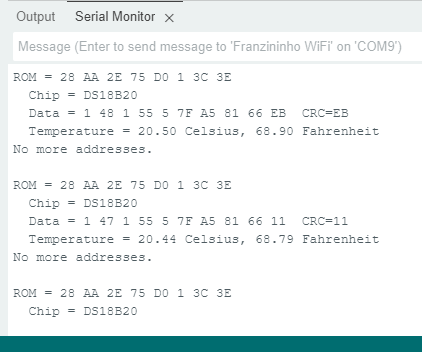
Fazendo o download do código para a placa Franzininho WiFi (com a mesma conectada via USB ao computador), temos o resultado abaixo. Veja que o código sabe qual tipo de chip conectado, além do conteúdo da ROM e temperatura atual.
O DS18b20 é um sensor simples porém robusto, podendo ser aplicado até em ambientes industriais (se corretamente encapsulado). Sua facilidade de uso o torna ideal para pequenas automações. Quer conhecer outro sensor de temperatura? confira sobre o SHT21.


Deixe um comentário