Hoje conheceremos o display E-paper de 2,9″ da WeAct, um pequeno e-paper bacana que pode ser usado com Arduino. Hoje especificamente, vou programá-lo com o Raspberry Pi Pico, em código Arduino.
Um e-paper é um display que basicamente não emite luz, como os encontrados no Amazon Kindle, por exemplo. Outros leitores eletrônicos também usam essa tecnologia.
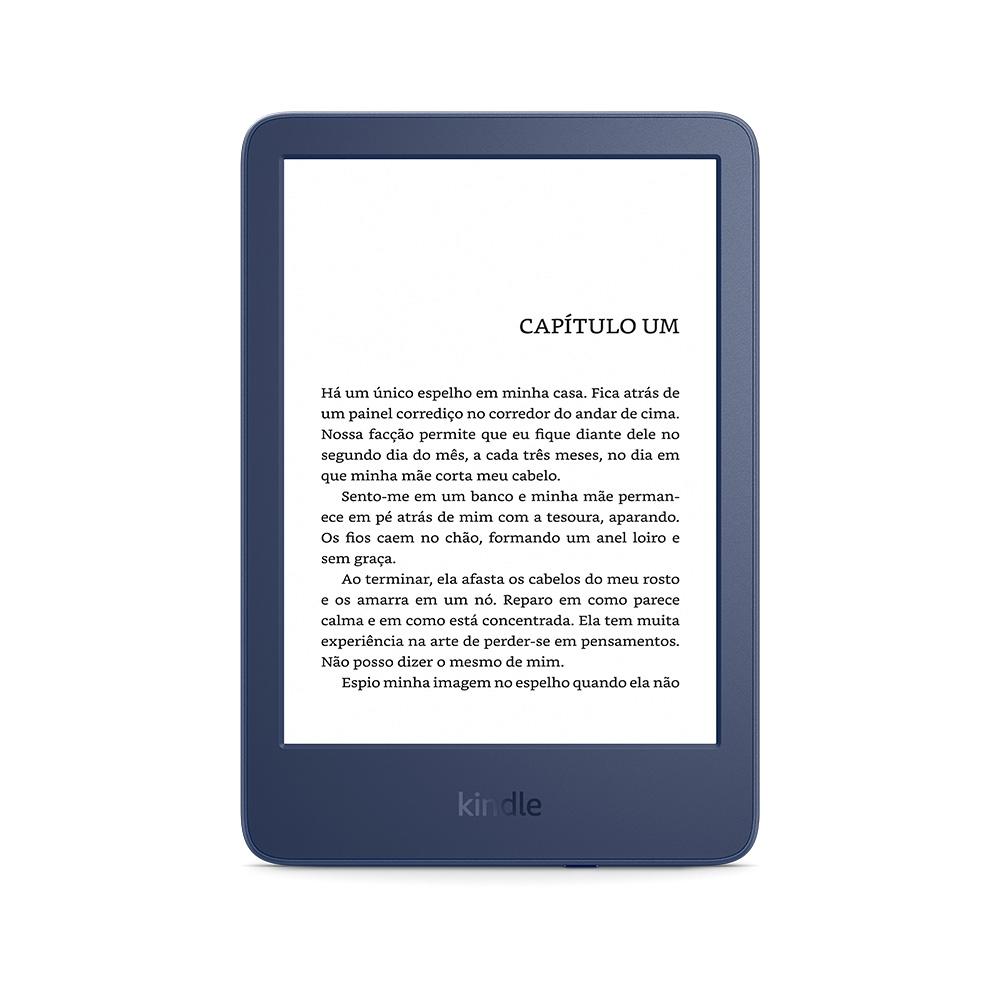
A principal vantagem desses displays é que eles não consomem energia quando não estão “em uso” ou não estão mudando sua imagem. Você pode definir uma imagem e desligá-la, nenhuma energia será consumida e a imagem ainda estará lá.
Usaremos um modelo específico para nossos testes, um WeAct de 2,9″ da Aliexpress (compre aqui). Ele usa comunicação SPI e funciona com 3,3V.
Pinagem
A primeira coisa que você precisa fazer é instalar a biblioteca Adafruit EPD do Arduino IDE ou daqui. Ou no Arduino IDE vá em “Sketch > Include library > Manage library” e digite “Adafuirt EPD”. Há também uma biblioteca oficial WeAct, que não compilou para mim.
No Arduino IDE, abra o sketch EPDtest (File > Examples > Adafruit EPD > EPDtest) e altere-o de acordo com sua pinagem. Eu fiz como abaixo:
#define EPD_DC 10
#define EPD_CS 15
#define EPD_BUSY 7 // can set to -1 to not use a pin (will wait a fixed delay)
#define SRAM_CS -1
#define EPD_RESET 8  // can set to -1 and share with microcontroller Reset!
#define EPD_SPI &SPI // primary SPI
217 / 5,000
Translation results
Translation result
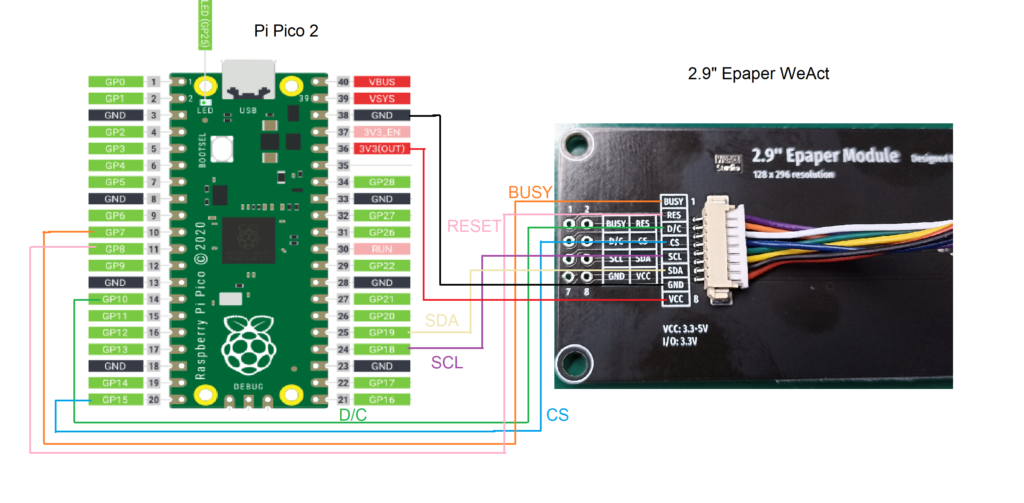
Configurando pinos SPI para o Raspberry Pi Pico como abaixo, funcionou para mim:
- Display SCL -> GPIO 18 SPI0 SCK
- Display SDA -> GPIO 19 SPI0 TX
Abaixo você pode ver o diagrama de pinagem e a montagem física do protótipo:

Selecionando o controlador correto
No esboço do EPDtest eu ainda tinha que selecionar um chip controlador, então descomentei as linhas abaixo (completamente por alteração, até acertar):
// Uncomment the following line if you are using 2.9" EPD with SSD1680
Adafruit_SSD1680 display(296, 128, EPD_DC, EPD_RESET, EPD_CS, SRAM_CS,
EPD_BUSY, EPD_SPI);
Em seguida, criei meu próprio esboço de teste inicial, como visto abaixo (imagem abaixo também):
/***************************************************
Adafruit invests time and resources providing this open source code,
please support Adafruit and open-source hardware by purchasing
products from Adafruit!
Written by Limor Fried/Ladyada for Adafruit Industries.
MIT license, all text above must be included in any redistribution
****************************************************/
#include "Adafruit_EPD.h"
#include <Adafruit_GFX.h> // Core graphics library
#ifdef ARDUINO_ADAFRUIT_FEATHER_RP2040_THINKINK // detects if compiling for
// Feather RP2040 ThinkInk
#define EPD_DC PIN_EPD_DC // ThinkInk 24-pin connector DC
#define EPD_CS PIN_EPD_CS // ThinkInk 24-pin connector CS
#define EPD_BUSY PIN_EPD_BUSY // ThinkInk 24-pin connector Busy
#define SRAM_CS -1 // use onboard RAM
#define EPD_RESET PIN_EPD_RESET // ThinkInk 24-pin connector Reset
#define EPD_SPI &SPI1 // secondary SPI for ThinkInk
#else
#define EPD_DC 10
#define EPD_CS 15
#define EPD_BUSY 7 // can set to -1 to not use a pin (will wait a fixed delay)
#define SRAM_CS -1
#define EPD_RESET 8 // can set to -1 and share with microcontroller Reset!
#define EPD_SPI &SPI // primary SPI
#endif
/* Uncomment the following line if you are using 1.54" tricolor EPD */
// Adafruit_IL0373 display(152, 152, EPD_DC, EPD_RESET, EPD_CS, SRAM_CS,
// EPD_BUSY, EPD_SPI);
/* Uncomment the following line if you are using 1.54" monochrome EPD */
// Adafruit_SSD1608 display(200, 200, EPD_DC, EPD_RESET, EPD_CS, SRAM_CS,
// EPD_BUSY, EPD_SPI);
/* Uncomment the following line if you are using 2.13" tricolor EPD */
//Adafruit_IL0373 display(212, 104, EPD_DC, EPD_RESET, EPD_CS, SRAM_CS, EPD_BUSY,
// EPD_SPI);
//#define FLEXIBLE_213
/* Uncomment the following line if you are using 2.13" monochrome 250*122 EPD */
// Adafruit_SSD1675 display(250, 122, EPD_DC, EPD_RESET, EPD_CS, SRAM_CS,
// EPD_BUSY, EPD_SPI);
/* Uncomment the following line if you are using 2.7" tricolor or grayscale EPD
*/
// Adafruit_IL91874 display(264, 176, EPD_DC, EPD_RESET, EPD_CS, SRAM_CS,
// EPD_BUSY, EPD_SPI);
/* Uncomment the following line if you are using 2.9" EPD */
// Adafruit_IL0373 display(296, 128, EPD_DC, EPD_RESET, EPD_CS, SRAM_CS,
// EPD_BUSY, EPD_SPI); #define FLEXIBLE_290
/* Uncomment the following line if you are using 4.2" tricolor EPD */
// Adafruit_IL0398 display(300, 400, EPD_DC, EPD_RESET, EPD_CS, SRAM_CS,
// EPD_BUSY, EPD_SPI);
// Uncomment the following line if you are using 2.9" EPD with SSD1680
Adafruit_SSD1680 display(296, 128, EPD_DC, EPD_RESET, EPD_CS, SRAM_CS,
EPD_BUSY, EPD_SPI);
void setup() {
// put your setup code here, to run once:
display.begin();
display.clearBuffer();
}
void loop() {
// put your main code here, to run repeatedly:
display.clearBuffer();
display.setCursor(5, 5);
//display.fillScreen(EPD_WHITE);
display.setTextColor(EPD_BLACK);
display.setTextSize(3);
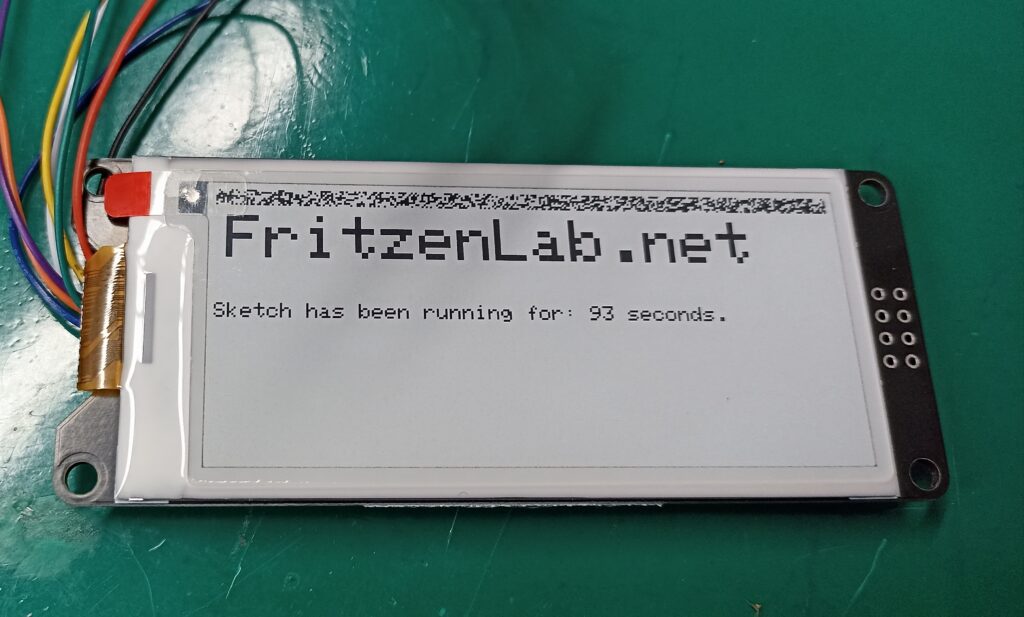
display.println("FritzenLab.net");
display.setTextSize(1);
//display.setTextColor(EPD_RED);
display.setCursor(5, 40); //(x, y)/?
//display.println(" ");
//display.print(8675309, HEX); // print 8,675,309 out in HEX!
//display.println(" Print HEX!");
display.println(" ");
//display.setTextColor(EPD_BLACK);
display.print("Sketch has been running for: ");
display.print(millis() / 1000);
//display.setTextColor(EPD_BLACK);
display.print(" seconds.");
display.display();
delay(5000);
}O upload do código do IDE para o Raspberry Pi Pico resultou na imagem abaixo sendo mostrada no display do e-paper. Há um contador de tempo ao vivo em segundos, para o tempo em que ele está sendo executado desde a inicialização.
Pra finalizar
Usar esta biblioteca Adafruit me permite acelerar os testes e a codificação. Ela é até capaz de desenhar gráficos (retângulos, triângulos, etc.). A taxa de atualização do display é super lenta e produz muito “lixo visual”, mas acho que é exatamente isso que os displays de e-paper são.
Quer saber mais sobre displays? Confira este artigo sobre OLED. Quer comprar um e-paper? Use meu link patrocinado aqui.


Pingback: Você vai amar este temporizador pomodoro - Fritzenlab eletrônica